Smart lighting is one of the easiest ways to dip your toes into home automation. The idea of controlling your lights with a tap on your phone or a voice command feels like something out of a sci-fi movie, but setting it up doesn’t have to be intimidating. I’ve tried a bunch of beginner projects over the years, and I’m here to walk you through how you can make your house lights smart and start enjoying the convenience and fun of DIY smart lighting, even if you’ve never touched a soldering iron or written a line of code before.
Why Start With Smart Lighting?
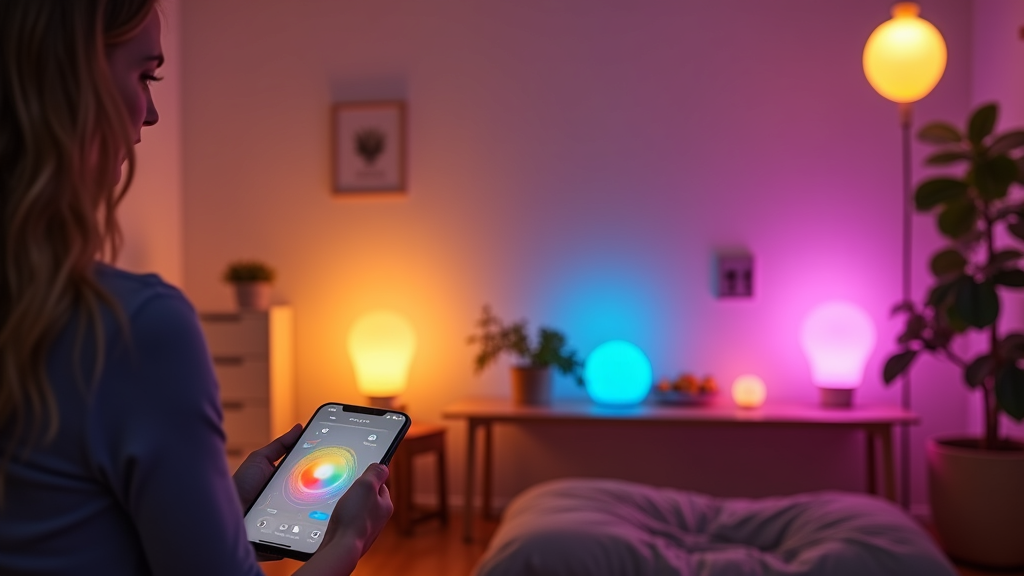
Smart lighting has taken off because it actually makes everyday living more flexible and a bit more fun. For beginners, it’s one of the easiest ways to see how home automation can improve comfort and save energy. You can automate lights to turn on or off at certain times, change colors to match your mood, or control the whole house while sitting on the couch. These projects are beginner-friendly but offer enough custom options to get creative and learn new things, like how to set up basic automation or control things with your phone.
Since most modern systems use WiFi, Zigbee, Zwave, or Bluetooth, you can start with just one or two bulbs or switches and expand over time. Plus, choices like Philips Hue, TP Link Kasa, and even inexpensive WiFi bulbs from brands like Wyze make it easy to pick a starting point that matches your comfort level and budget. You’ll also notice that WiFi bulbs are perfect for apartments, while switches may be better suited for houses where wiring changes are possible.
What You Need To Get Started With DIY Smart Lighting
Transforming your home with smart lighting doesn’t have to be expensive or complicated. Here’s a practical list of what new DIYers usually start with:
- Smart Bulbs: Plug them into a standard lamp or fixture, connect to WiFi or Bluetooth, and control them using a phone app. These bulbs can change color and brightness, supporting everything from cozy warm white to party mode.
- Smart Plugs: Great for lamps and string lights. Just plug in, set up using the app, and control or schedule your lighting remotely. They work wonders for older lamps or decorative pieces you want to automate with zero hassle.
- Smart Switches: These replace your existing wall light switches. Some require wiring, so read the instructions carefully and turn off the power if you install them. Many new models feature touch controls and work seamlessly with smart platforms.
- Hub (Optional): Some systems work without a hub, but brands like Philips Hue or Zigbee-based systems need one. Hubs let you control lots of devices more reliably, especially if you want things to run even when your internet is down.
- Smartphone or Tablet: Most smart lighting systems use a mobile app for setup and daily control. A tablet dedicated to smart home control can serve as a handy central station.
- Voice Assistants (Optional): Alexa, Google Assistant, or Siri add voice control if you like handsfree convenience. Saying “turn on the porch light” never gets old.
Most basic projects don’t require any wiring changes or programming, but those options are out there if you want a bit more challenge. Always check compatibility with your home WiFi or smart home assistant before picking your gear to avoid frustration later on.
Step-By-Step: Making All Your House Lights Smart
If you want to make your house lights smart, you can go about it in a few different ways depending on your setup:
- Replace Bulbs In Lamps and Fixtures: Swapping standard bulbs for smart bulbs is quick and no harder than changing out any other lightbulb. Once installed, open the companion app, add the bulb, and follow the on screen instructions to connect it to WiFi or Bluetooth. This works great if you want color-changing lighting or easy scheduling.
- Install Smart Switches For Existing Lights: For ceiling fixtures or rooms with lots of bulbs, replacing the wall switch can be more practical and cost-effective than replacing every bulb. Most basic smart switches fit in standard switch boxes and can be wired using standard tools. Just remember to turn off the electricity at the breaker before you start! They let you keep using your existing bulbs but add automation and remote access.
- Add Smart Plugs For Decorative Or Table Lamps: Plugin smart plugs are my favorite for renters or anyone who doesn’t want to get into wiring. Plug your lamp into the smart plug, link to your WiFi, and you’re ready to turn things on and off remotely or with scheduling.
With these steps, you can make your house lights smart room by room or all at once. The key is to decide what matters more for you: style, price, or simplicity. Start with a solution you’ll actually use every day and build up as your confidence grows.
Planning A Lighting Project: Simple Ideas For Beginners
Starting a DIY lighting project is easier when you follow a plan, even if it’s just scribbled on the back of a napkin. Here’s a straightforward approach any beginner can use:
- Pick Your Space: Start small, maybe a bedroom, living room, or entryway where you spend the most time.
- Set Your Goal: Examples include voice control, scheduling lights to your routine, or adding some color-changing LEDs under kitchen cabinets for extra flair.
- Choose Your Gear: Decide if you want smart bulbs, switches, or plugs. Check that your choices work with your phone or smart speaker and fit your budget.
- Gather Tools and Apps: Most projects only need a screwdriver and your phone. Download the app connected to your devices before you start so installation is quick.
- Set Up and Test: Follow directions for mounting, wiring, and pairing devices. Test everything before putting covers or fixtures back in place; it’s easier to fix issues with everything exposed.
Careful planning helps you avoid wasting time or money, and it makes troubleshooting a lot easier if things don’t work right away. It also means you’re less likely to run into compatibility headaches as you build out your system.
Programming DIY LED Lights: Getting Creative With Code
Programming your own DIY LED lights takes projects up a notch, especially if you get into addressable LEDs (like WS2812 or NeoPixel strips). If you’re curious how to do this, here’s the roadmap I usually recommend for beginners:
- Microcontroller: Use something like an Arduino Uno or ESP8266/ESP32 since they’re affordable and well-documented. These boards support lots of smart lighting projects and have huge online communities for support.
- LED Strip: Addressable LED strips let you control each light individually for colorful effects or animations. These give you total flexibility with effects and allow for next-level cool light shows for holidays or events.
- Programming: Use simple platforms like Arduino IDE. Libraries such as FastLED or Adafruit NeoPixel make coding patterns, fades, or rainbow effects pretty approachable. There are sample codes everywhere to get started.
- Power Supply: Make sure your power supply can handle the number of LEDs you plan to use. Each pixel draws a bit of current, and running out of juice causes flicker or color errors.
- Code Example: Here’s a really basic example for an Arduino and WS2812 strip:
// Include library for LEDs
#include
#define PIN        6
#define NUMPIXELS 30
Adafruit_NeoPixel strip(NUMPIXELS, PIN, NEO_GRB + NEO_KHZ800);
void setup() {
  strip.begin();
}
void loop() {
  for(int i=0;i
    strip.setPixelColor(i, strip.Color(255,0,0)); // Red
    strip.show();
    delay(50);
    strip.setPixelColor(i, 0); // Off
  }
}
Programming opens up a lot of creative options. You can set the strip to respond to sound, schedule it with a timer, or create lighting animations for special occasions. Online forums and YouTube tutorials make learning this way much less overwhelming since there are tons of visual, step-by-step guides out there. Many newcomers find that tweaking someone else’s code is a great way to learn without getting stuck.
Automating Smart Lighting In Your House
Automating lighting means setting up schedules, routines, or rules so your smart lights do the work without you having to think about it. Here are some techniques you can try:
- Smartphone App Automation: Most brands’ apps let you set basic schedules, like “turn on porch lights at sunset” or “dim bedside lamps at 11 pm.” These automations happen in the cloud, so you don’t need to leave a computer running all the time. Most apps also let you group bulbs for scenes or set vacation modes for added security.
- Home Assistant: If you want maximum customization, free tools like Home Assistant or SmartThings let you program routines, triggers, and even create custom dashboards that blend lighting with things like sensors or music. Home Assistant can be installed on a Raspberry Pi or old computer, then connected to nearly any brand of smart lighting out there. Enthusiasts often use Home Assistant to make very detailed, room-by-room automation, including color changes based on weather or motion.
- Voice Automations: With Alexa or Google Assistant, you can set up “routines” that connect several actions together. For example, you might turn on the hallway light, set the living room light to warm white, and read out the weather at the same time every morning. This is perfect for automating morning or evening routines for the whole family.
- Advanced Triggers: Use inexpensive smart motion sensors to set lights to turn on when you walk into a room and off after you leave. Door sensors let you trigger lights automatically when you open the front door at night and can double as a security measure. You can also set lights to adjust based on sunrise, sunset, or your phone’s location.
With the right devices, automating lighting in your house becomes a set-it-and-forget-it upgrade. It is great for day-to-day comfort, helps save energy, and can impress friends and family with some high-tech convenience and next-level cool effects.
Real-World Tips: What To Know Before Jumping Into Smart Lighting
- WiFi Coverage Matters: Smart devices need decent WiFi, especially in larger houses. If you have spotty coverage, look into mesh systems or WiFi extenders to make sure your lights respond consistently.
- Think About Compatibility: Not every device plays nice with every platform. Read reviews and make sure your bulbs or switches work with your chosen app or voice assistant to avoid connectivity headaches later.
- Start Small And Expand: Try out one room before investing in a whole-house setup. This approach helps you learn and prevents headaches if you change your mind about brands or features.
- Have Spare Regular Bulbs: If a smart bulb fails, it’s handy to have extras so you’re never left in the dark. Smart bulbs are reliable but not immune to power surges or app glitches.
- Don’t Stress About Perfection: It’s normal to tweak things and experiment as you go. Part of the learning process is trying different ideas to see what fits your lifestyle best, and sometimes a little trial and error goes a long way.
Personal Experience With DIY Smart Lighting
When I did my first smart lighting project, I started with cheap WiFi bulbs from a local store. Setting them up in the living room took about ten minutes, and getting them responding to Alexa for the first time felt pretty cool. Later, I switched some table lamps to smart plugs and automated the lights to adjust based on sunset and sunrise using the app. Even my family enjoyed having everything controlled by phone, or just shouting, “Lights off!” across the room. I’ve found that starting simple and scaling up over time works best for most people, especially if you’re still figuring out your preferences. Over time, you learn which features you use every day and where splashy effects are just for fun.
Frequently Asked Questions
How can I make my house lights all smart?
Start with the easiest spots (like lamps) using smart bulbs or smart plugs. For overhead or built-in lights, swap your old light switches for smart switches; just check that your wiring has a neutral line, as most smart switches need one. Expand as you get comfortable, choosing hardware that works with your favorite app or smart speaker. For whole-home setups, planning is really important so you avoid mixing too many brands unless you’re using a universal hub or platform.
How to make a lighting project?
Choose a small space, set a goal (like scheduling or color-changing), pick the right smart bulb or switch, and follow the manufacturer’s app setup guide. If you want to build something unique, try a kit for programmable LED strips. These teach basics like wiring and code, and open up creative lighting displays for shelves, desks, or under cabinets. DIY kits are perfect for learning and creation, as they offer flexibility and lots of troubleshooting practice.
How to program DIY LED lights?
Use a microcontroller (like an Arduino or ESP8266/ESP32) and a compatible LED strip. Load up the Arduino IDE, add a library like FastLED, and try one of the built-in example codes. Adjust colors, patterns, or brightness, and watch your strips light up. Tons of online tutorials and code samples are available, so you don’t have to write everything from scratch. As you improve, you’ll start customizing effects and syncing them with music or other triggers for fun party vibes.
How to automate lighting in a house?
App-based scheduling is the fastest way. For more advanced automation, use a hub (like Home Assistant or SmartThings) to connect devices from various brands. Add motion sensors for handsfree automation or use voice assistants to set custom routines. Automating lights makes life more comfortable and helps save energy by ensuring nothing gets left on when you’re not home. Experimenting with routines also adds an extra layer of security when you’re away for extended periods.
Wrap-Up: Next Steps In Your Smart Lighting Adventure
DIY smart lighting brings a lot of flexibility, convenience, and fun to even the most basic of spaces. When you start small and build up from there, you’ll quickly figure out what works for your own habits and living space. Schedules, automations, and custom scenes don’t just make your day-to-day life easier; they also let you get creative. Whether you stick to app-based lights or start tinkering with programmable LEDs, there’s no shortage of ways to brighten up your home and learn some cool new skills along the way. As you get comfortable, don’t hesitate to experiment—new smart lighting gadgets and features keep coming out, so there’s always something new to add or tweak. Have fun, and let your space show off your personality!